
Here's how to add 1.5 or 3 degrees negative camber to the back of your Forte!
UPDATE 10/6/14: There is also a thread on using standard washers for those of you that don't want to use plastic shims. Can also add more camber using the method here: http://www.forteforums.com/forums/showthread.php?t=59010
NOTE: This was installed on a 2011 Forte EX hatch, but SX models appear identical. 2010-2013 Koup, sedan, and hatchback have the same overall design.
Supplies needed:
Shims (obviously!) - We used Special Products #75800 for this install. *ADDITIONAL: SPC now makes shims specifically for the Forte. These are #75600 and are yellow.
You'll need 2 if you're adding 1.5 degree, or 4 shims for 3 degree (double-stacked)
Bolts - For -1.5 degree camber you should be able to reuse the stock bolts. For -3 degree, I highly recommend you purchase 4 bolts size M10x1.25 @ 40mm length. You run the risk of stripping thread in the hub without these. You may want a couple extra bolts for the safety bracket noted in step 9 below.
1. Preparation. Remove the shims from the packs. Notice the shim has numbers all around the outer edge. Using diagram #7 on the included instruction sheet, align the shim with #20 facing out at the top.
![Image]()
Cut out the shaded fingers with an appropriate razor knife. A sharper blade will help with precise cuts. The upper left, upper right, and lower right will have two fingers cut out of each. The lower left will have three fingers cut out. Repeat this step with all shims.
2. Raise the back of the car and support with jack stands. If you're on an incline, chock the front wheels. Raising the car high enough to sit and reach behind the hub will save stress on your back.
3. Remove the wheels.
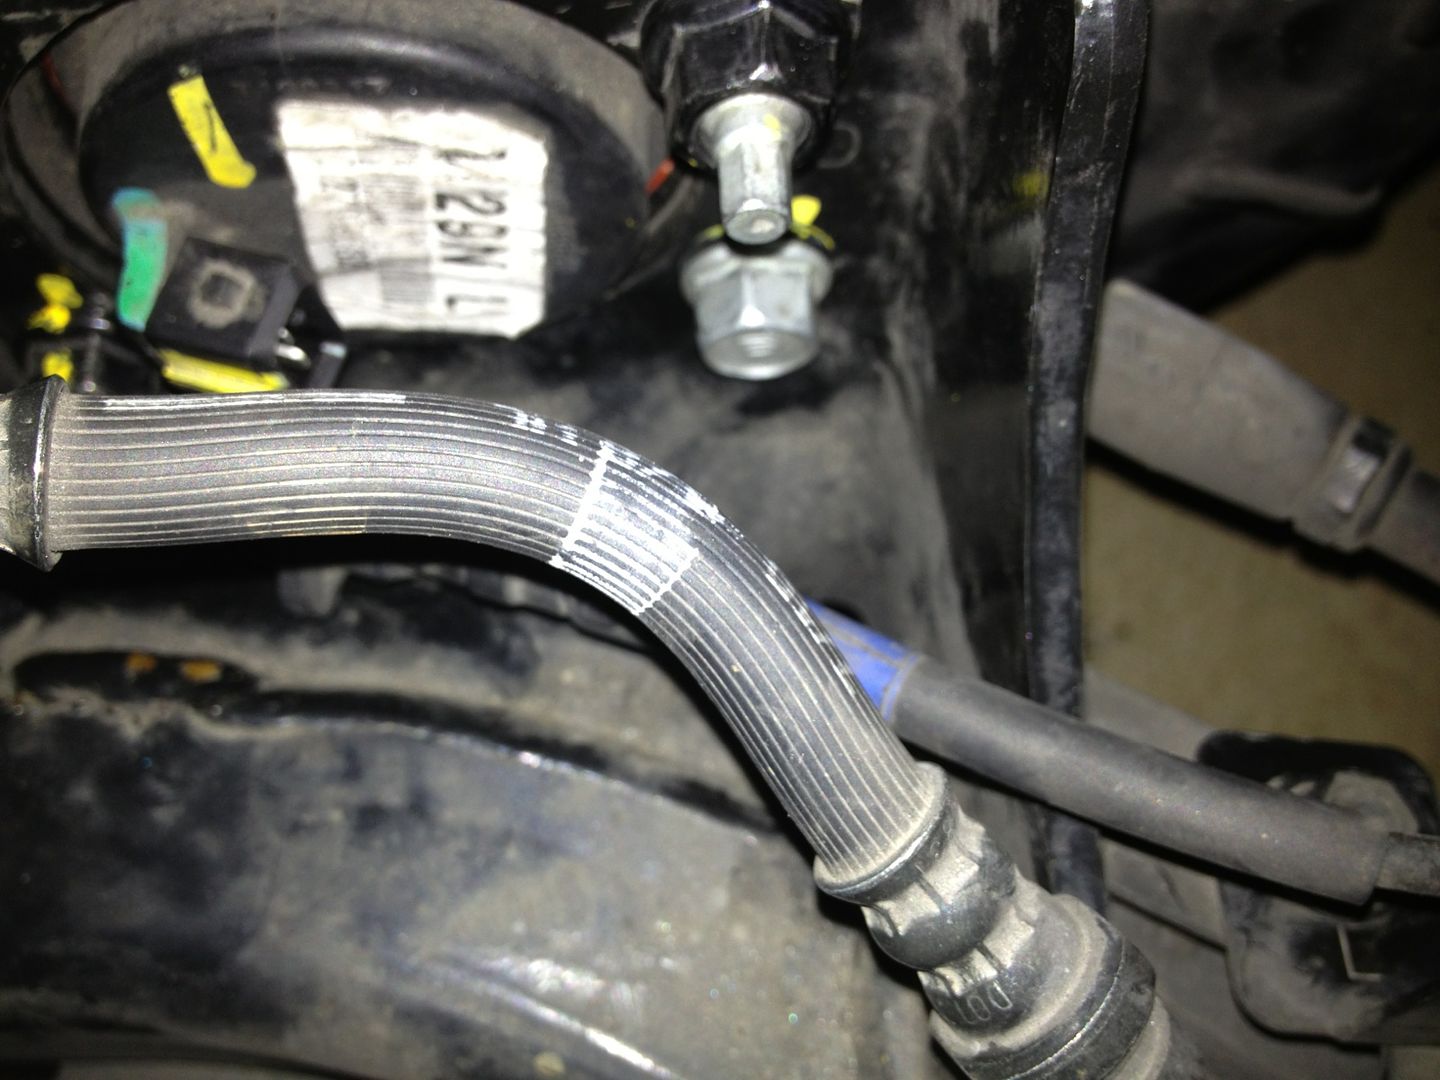
4. Stick your head in the wheel well and look behind the hub. You'll notice two bolts and two studs holding the hub on. You'll also see a wire going into a harness in the middle of the hub. This wire is for the ABS sensor and must be disconnected. Take some needle-nose pliers and remove the metal clip going across the connector. Then gently wiggle the connector until it slides off the sensor. I don't have a good picture of the harness connected, but here is a pic of the sensor disconnected.
![Image]()
5. There are two nuts on opposing corners. Remove these with a 14mm wrench or socket. The opposing corners will have two bolts. Remove these as well.
6. Remove the upper caliper mounting bracket bolt (Not the caliper bolt itself, but the bracket it attaches to). When you remove this bolt, a bracket with 4 bolt holes will be loose. Remove this bracket and save it.
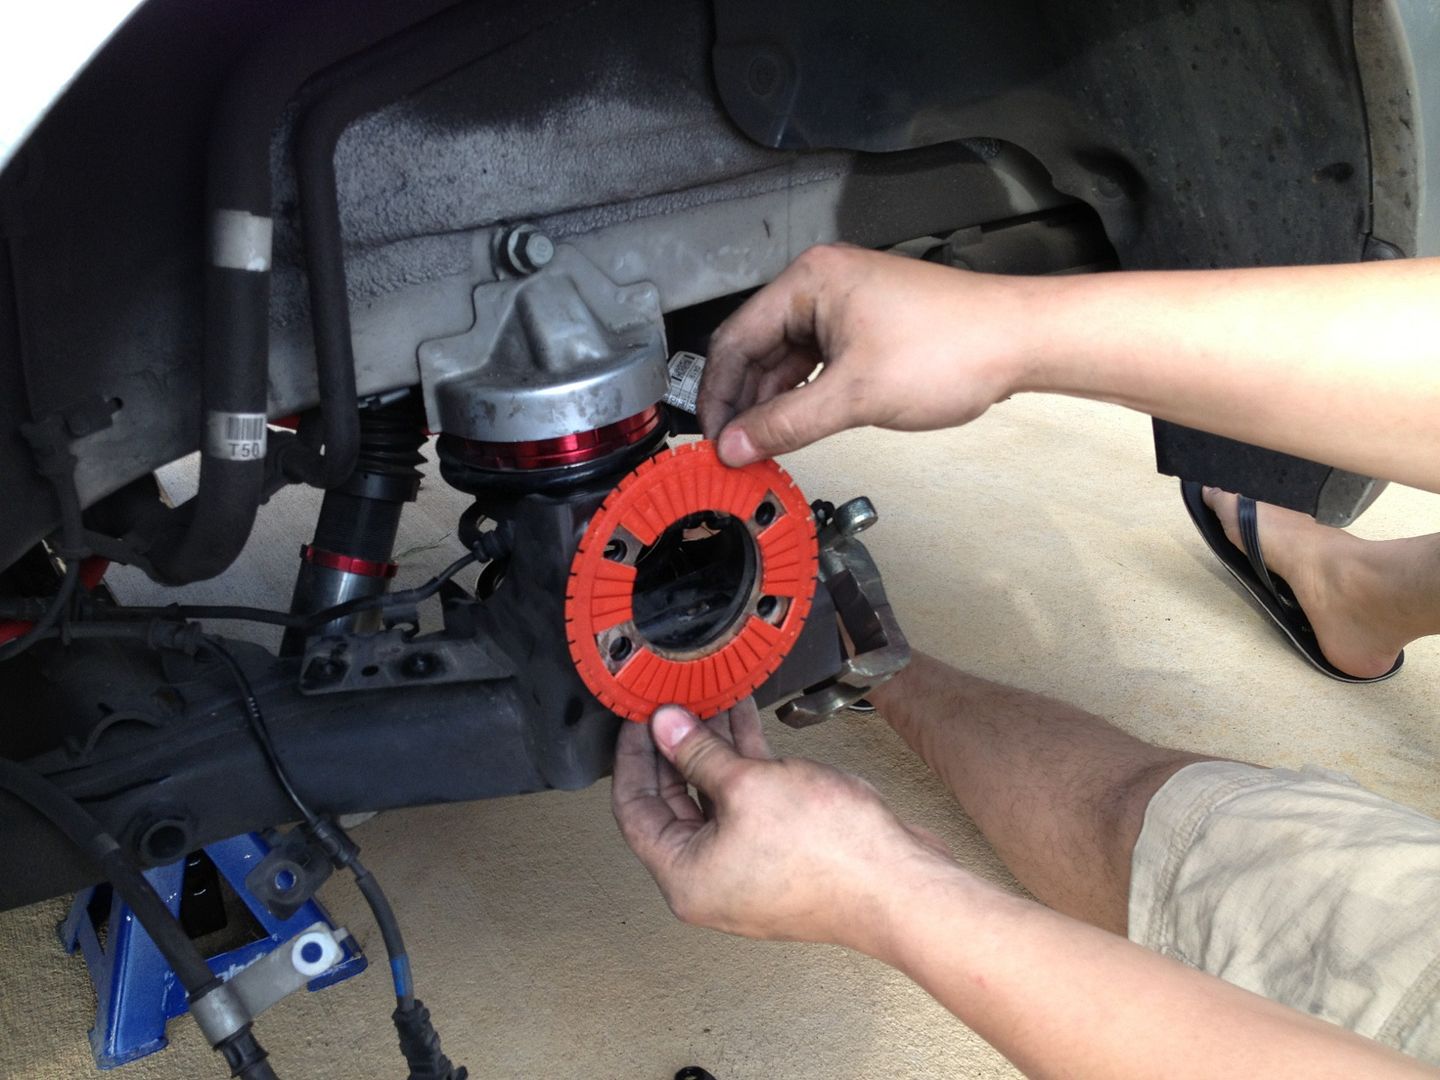
7. Get your shims ready. Remember the corner of the shim with three fingers missing goes on the lower left. Slide the hub toward you just enough to clear the studs. Hang the shims on the studs.
This pic shows the hub pulled completely away. You don't have to pull it all the way off unless you damage threads (we did). This is where the shim(s) will sit.
![Image]()
8. Slide the hub back on. If you're doing the driver's side, put the lower left bolt/nut back on to hold the hub on (use the new bolts you purchased). If you're doing the passenger side, put the lower right bolt/nut back on and read the next step.
9. Remember that bracket you saved? Get it, and decide how you want to proceed.
a. Bend it so that the top ear will sit flush on the caliper mounting bracket. This is the route I went, and it worked well.
b. Use washers to fill the gap. Don't forget to use the longer bolts when you reinstall.
c. Leave it off. This method IS NOT RECOMMENDED as the bracket is a safety device that ensures if something happens to the hub, the hub and wheel assembly does not fall off the car when you're driving and helps keep the assembly solid.
10. Reinstall all the bolts/nuts including the caliper mounting bracket. The new bolts will most likely take a 17mm socket or wrench as the head size is different. The instructions for the shims dictates torquing to 40 ft/lbs.
11. Take the harness connector for the ABS sensor, slide the metal clip back into it, then hook back up to the connector (you'll hear a click when it locks). Yes, you can put the clip back on before reconnecting.
12. Double check to make sure everything is tightened down, then put the wheels back on.
Last note: If, for some reason, you have to remove the hub all the way you will want to remove the three 12mm bolts holding the brake line, e-brake cable, and the ABS sensor wire just forward of the hub.
UPDATE 10/6/14: There is also a thread on using standard washers for those of you that don't want to use plastic shims. Can also add more camber using the method here: http://www.forteforums.com/forums/showthread.php?t=59010
NOTE: This was installed on a 2011 Forte EX hatch, but SX models appear identical. 2010-2013 Koup, sedan, and hatchback have the same overall design.
Supplies needed:
Shims (obviously!) - We used Special Products #75800 for this install. *ADDITIONAL: SPC now makes shims specifically for the Forte. These are #75600 and are yellow.
You'll need 2 if you're adding 1.5 degree, or 4 shims for 3 degree (double-stacked)
Bolts - For -1.5 degree camber you should be able to reuse the stock bolts. For -3 degree, I highly recommend you purchase 4 bolts size M10x1.25 @ 40mm length. You run the risk of stripping thread in the hub without these. You may want a couple extra bolts for the safety bracket noted in step 9 below.
1. Preparation. Remove the shims from the packs. Notice the shim has numbers all around the outer edge. Using diagram #7 on the included instruction sheet, align the shim with #20 facing out at the top.

Cut out the shaded fingers with an appropriate razor knife. A sharper blade will help with precise cuts. The upper left, upper right, and lower right will have two fingers cut out of each. The lower left will have three fingers cut out. Repeat this step with all shims.
2. Raise the back of the car and support with jack stands. If you're on an incline, chock the front wheels. Raising the car high enough to sit and reach behind the hub will save stress on your back.
3. Remove the wheels.
4. Stick your head in the wheel well and look behind the hub. You'll notice two bolts and two studs holding the hub on. You'll also see a wire going into a harness in the middle of the hub. This wire is for the ABS sensor and must be disconnected. Take some needle-nose pliers and remove the metal clip going across the connector. Then gently wiggle the connector until it slides off the sensor. I don't have a good picture of the harness connected, but here is a pic of the sensor disconnected.
5. There are two nuts on opposing corners. Remove these with a 14mm wrench or socket. The opposing corners will have two bolts. Remove these as well.
6. Remove the upper caliper mounting bracket bolt (Not the caliper bolt itself, but the bracket it attaches to). When you remove this bolt, a bracket with 4 bolt holes will be loose. Remove this bracket and save it.
7. Get your shims ready. Remember the corner of the shim with three fingers missing goes on the lower left. Slide the hub toward you just enough to clear the studs. Hang the shims on the studs.
This pic shows the hub pulled completely away. You don't have to pull it all the way off unless you damage threads (we did). This is where the shim(s) will sit.
8. Slide the hub back on. If you're doing the driver's side, put the lower left bolt/nut back on to hold the hub on (use the new bolts you purchased). If you're doing the passenger side, put the lower right bolt/nut back on and read the next step.
9. Remember that bracket you saved? Get it, and decide how you want to proceed.
a. Bend it so that the top ear will sit flush on the caliper mounting bracket. This is the route I went, and it worked well.
b. Use washers to fill the gap. Don't forget to use the longer bolts when you reinstall.
c. Leave it off. This method IS NOT RECOMMENDED as the bracket is a safety device that ensures if something happens to the hub, the hub and wheel assembly does not fall off the car when you're driving and helps keep the assembly solid.
10. Reinstall all the bolts/nuts including the caliper mounting bracket. The new bolts will most likely take a 17mm socket or wrench as the head size is different. The instructions for the shims dictates torquing to 40 ft/lbs.
11. Take the harness connector for the ABS sensor, slide the metal clip back into it, then hook back up to the connector (you'll hear a click when it locks). Yes, you can put the clip back on before reconnecting.
12. Double check to make sure everything is tightened down, then put the wheels back on.
Last note: If, for some reason, you have to remove the hub all the way you will want to remove the three 12mm bolts holding the brake line, e-brake cable, and the ABS sensor wire just forward of the hub.